Incident Response Series: Collecting and analyzing logs in azure ad
Today, I’m going to start my incident response series. Where I will focus on Azure Active Directory and Office 365. What are the steps, that we have to take when doing an IR engagement in a Cloud environment?
Incident Response is a broad topic and it’s hard to cover every specific detail, so I’ve decided to split it into a series of blog posts. However, that’s been said. Today’s focus will be on collecting logs in a Cloud environment to perform further analysis. This blog post is targeted for the incident response audience or security professionals with an interest in doing IR, but with the main focus on Azure AD.
The goal of this blog post is to learn more about how logging works in Azure AD and how we can collect it to use it for forensics.
Why collecting logs?
Every step that an adversary takes will leave some form of traces behind in the logging. Logs are usually one of the first places to look at, but now the question would be. What kind of logs can or should we collect?
Here are a few examples:
| Data Source | Description |
| Azure Active Directory – Sign-In Logs | All the sign-in events of user principals |
| Azure Active Directory – Audit Logs | All the activities in Azure AD such as modification of objects |
| Office 365 – Unified Audit Logs | All the activities in Office 365 with the likes of Exchange, SharePoint, and Teams. Includes Azure AD logs as well |
There are other logs as well, such as Azure Activity. But for now, the focus will be Azure AD & Office 365.
Collecting Azure AD logs
As we all know, the majority of organizations don’t have Azure Sentinel or Log Analytics in place to monitor and alert on threats or maybe even changes, that occur in their tenant.
The good thing is that we are able to export logs, that have been generated, which allows us to get all the relevant data to analyse.
Use-case
An organization has called you, because there was a breach in their tenant. They have created an account for you with Global Reader rights, so you could access their environment and as discussed earlier. The logs are the first place to look at, when doing an IR engagement.
The first logs that we are going to export will be Azure Active Directory Audit logs and the Sign-In logs.
In order to do this, we have to do the following:
- Go to the Azure Portal
- Click on ‘Azure Active Directory’
- Click on ‘Audit logs’ at the left side
Do the same for Sign-In logs by clicking on ‘Sign-ins’
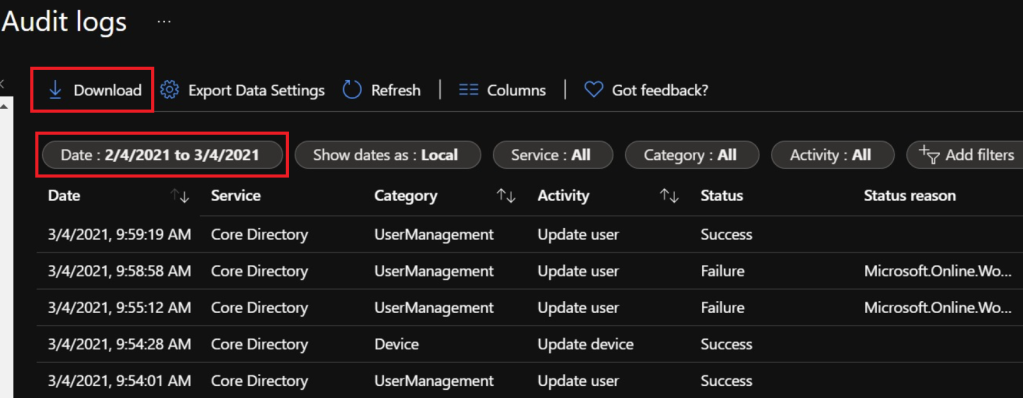
As you will notice, there is a ‘Download’ button that we can use to download the logs from the past 30 days. An important thing to note is, that it’s limited to 250,000 records.
When we open the CSV files, it will look something similar like this:
- Azure Active Directory – Audit Logs

- Azure Active Directory – Interactive Sign-In Logs

We have now downloaded both Azure AD Audit Logs and Sign-in logs. As you may have notice, it is very hard to analyze the data in a CSV file. We’ll get through this later.
What we also have to remember is, that we only get the logs from the past 30 days, but what if an incident occurred earlier than that?
The reason that I did include this is, because it is true that Office 365 unified audit logs also ingests events from Azure AD. However, it is not enabled by default. An organization has to manually enable this to receive those logs, and when they haven’t done that. We have to rely on the logs that we only could get, right?
Office 365 – Unified Audit Logs
The unified audit logs contains user, group, application, domain, and directory activities. It is available in the Microsoft 365 Compliance Center. This is the most important place to look at, because it contains both Office 365 & Azure AD logs.
An important thing to ask a customer before starting an IR engagement is, to see if they have enabled unified auditing or not.
To turn on auditing, we have to do the following:
- Go to Office 365 Security & Compliance center
- Go to ‘search’ and select ‘Audit log search’
- Click on ‘Turn on auditing’

In order to access the Office 365 Unified Audit Logs. We have to do the following:
- Go to Microsoft 365 security portal
- Click on ‘Audit’

Organizations with an E3 license can only search data up to 90 days, while E5 has a retention of a year. However, when we are searching for activities beyond 90 days. It will only return activities from users that have been assigned the appropriate license.
As you can recognize, there is an ”Export” button that we can use to download the results.

When we are opening the CSV file, it might look like the following:

I’ve heard from a couple of folks, that the exported results contains a lot of unstructured data, because as you might have notice. It is true that all the columns don’t fit in the exported spreadsheet, but there is a way to tackle this problem.
Azure Sentinel – Watchlist
There is a feature in Azure Sentinel that’s called ‘Watchlist’, which enables the collection of data from external data sources. This allows incident responders for example to import a CSV file, so they can analyze it on a much efficient way by using built-in KQL queries.
Use case
An organization had a breach in their Azure tenant and they created an account for you with Global Reader rights, so you could access their environment to do further investigations. You had a bit of luck, because they did enabled Office 365 unified auditing. Besides of that, they did not had Azure Sentinel in place or something equivalent. They also had an E3 license, instead of E5. Which means that they didn’t had Microsoft 365 Defender.
Once you’ve decided to export the logs. You realize that it contains a lot of unstructured data, which might be hard to analyze.

A solution to tackle this problem could be setting up a private Azure Sentinel workspace for your IR team to use it for forensic purposes. If you are doing multiple IR engagements in Cloud environments, such as Azure AD. It may be worth considering it, because you could use Azure Sentinel then, to investigate and do some hunting in customer data. The only thing the customer would have to do then, would be providing an export of their logs. Just a few examples that I can think of right now.
As discussed before, we have exported the logs, which is stored in a CSV file. The second thing we are now going to do is import this CSV file in our own Azure Sentinel workspace for further investigation.
In order to do this:
- Create an Azure Sentinel workspace
- Go to ‘Watchlist’
- Import the CSV file

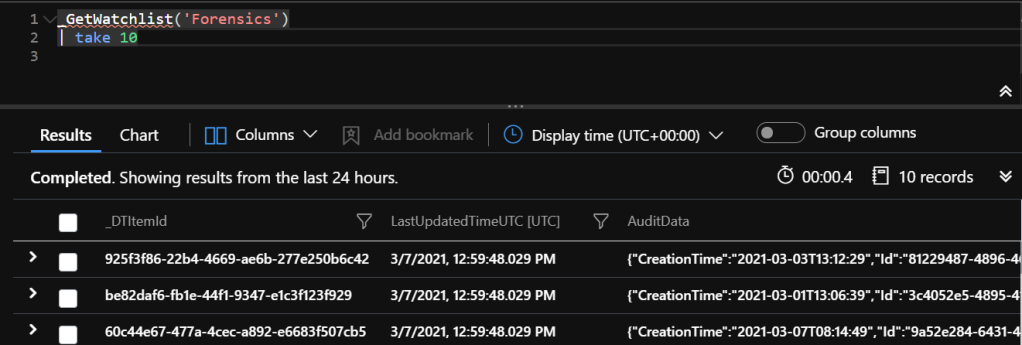
In this example, I’ve named the exported dataset as ‘Forensics’. Now when I want to return the records in the CSV file. All I have to do is use the _GetWatchlist function and call the named dataset.
Analyzing logs
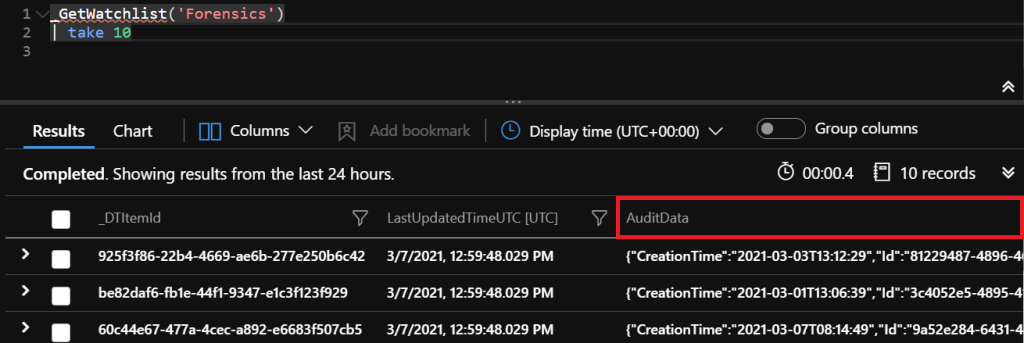
After we have imported the CSV file. It still displays the results in a unstructured fashion, because the ‘AuditData’ column stores different fields in a JSON format.
Great thing about KQL is that we can use the parse_json function to parse all the additional fields into columns.
As an example, we are going to look for users that have been added to a group. In order to return the data to a ”structured” format. We have to use the parse_json function to do so.
Here is a simple example:
Query

Results
After using the parse_json function. All the relevant fields that were stored in a JSON format are now parsed into columns, which makes it readable.
In the results, we can see who added a user to which group.

Summary
We have learnt how to export logs to use it for investigation. At this example, we were using Azure Sentinel Watchlist to import CSV files to analyze the results in a much more efficient way. This allows us to use KQL functions and operators to query the dataset, instead of looking around in the spreadsheet itself.
Besides of using the Watchlist feature in Azure Sentinel. There is also another way to do this, which is by using the externaldata operator for example. Keep in mind that a Log Analytics is still required to do so. Both methods are good, but use what you’ll prefer. In this case, I’ll prefer using the ‘Watchlist’ feature.
What’s next?
In my next blog post, I will focus on collecting all the relevant information in an Azure tenant. Collecting audit logs is one thing, but there are other important things as well, that we have to look at. A few examples would be exporting all the applications and the associated permissions, conditional access policies, risky sign-ins by Azure Identity Protection, and so on.
References
- Search the audit log in the compliance center: https://docs.microsoft.com/en-us/microsoft-365/compliance/search-the-audit-log-in-security-and-compliance?view=o365-worldwide
- How long does Azure AD store reporting data?: https://docs.microsoft.com/en-us/azure/active-directory/reports-monitoring/reference-reports-data-retention#how-long-does-azure-ad-store-the-data
- What’s new: Watchlist is now in public preview!: https://techcommunity.microsoft.com/t5/azure-sentinel/what-s-new-watchlist-is-now-in-public-preview/ba-p/1765887
- KQL functions and operators

If its Azure AD logs just enable collection. If its an external company and your doing this look into external_table(); not sure if id use watchlist for this.
https://docs.microsoft.com/en-us/azure/data-explorer/kusto/query/externaltablefunction
LikeLike